I wanted this blog to be inexpensive, easy to maintain, and secure. I also didn’t want to spend my time fiddling with HTML, CSS, and Javascript. There are several approaches I could have taken, but this approach met my needs the best.
Prerequisites
To get the most out of this article, you should be familiar with DNS, running commands at the CLI (Command Line Interface), HTTP basics, and using Git for source code management. It also wouldn’t hurt to be familiar with AWS but the provided AWS CloudFormation template encapsulates most of the moving parts in a tidy package – the same can be said for GitHub and the provided GitHub Actions script. That said, if you aren’t familiar with these technologies and aren’t afraid of getting your hands dirty, jump right in and learn as you go!
You will also need AWS, Cloudflare, and GitHub accounts. If you don’t already have accounts for these services, use the following links to vendor-specific documentation for creating accounts.
- Create an AWS Account - It is worth noting that you will need to enter a credit card when creating an AWS account, even if you only plan on using the free tier. It is possible to exceed AWS’s free tier and rack up a hefty bill if your site receives a significant volume of traffic. You are encouraged to read through AWS’s pricing documentation and to also learn how to set up billing alerts. YOU HAVE BEEN WARNED!
- Create a Cloudflare Account
- Create a GitHub account
Goals
Inexpensive - I don’t expect to make any money from this site, it is just a hobby. With that in mind, I want to keep costs to a minimum.
Easy to maintain - I wanted to spend my time writing content – not formatting, building, and deploying it. I just wanted to “push a button” when I was done and have the site update without any further involvement on my part – fire and forget.
Secure - I wanted to minimize the effort required to keep the site secure. I didn’t want to spend time applying security patches to software or recovering/rebuilding a compromised server. I have made a concerted effort to make this setup as secure as possible, but ultimately it is up to you to apply good security practices with your accounts and validate that I haven’t missed something in the provided instructions and files.
Technologies
Hugo
Hugo is a Static Site Generator (SSG). SSGs are based on some core ideas that satisfy many of my technical goals for this blog. Because the content is static, you don’t need to run a database or a specialized application server. This results in extremely fast load times and reduces your site’s attack surface. Most SSGs also use templating engines that abstract the user away from having to write HTML or CSS.
I ended up choosing Hugo due to its simplicity and its content generation speed. With Hugo, content is written in Markdown, a simple human-readable text format that is rendered into static HTML for your site. There are also well over 200 freely available Hugo Themes to choose from to help you personalize your site.
An additional bonus of Hugo is not having to install a runtime like node.js or ruby to generate your site. Hugo is written in Go which compiles to a single static executable. This means there are no dependencies to take care of and installation is simple.
Like most SSGs, Hugo has a built-in server that you can run while writing your site. As you save your changes your content will automatically refresh in your browser, giving you a live preview of what your site will look like.
If Hugo doesn’t meet your needs, there are plenty of other SSGs to choose from. Jamstack.org maintains a comprehensive list of static site generators if you want to explore other options. It should be fairly straightforward to swap out Hugo and use the rest of these instructions for deploying and serving your content.
AWS S3, CloudFront, Lambda, IAM, ACM, and CloudFormation
This was a no-brainer. There are other options (e.g. Google Cloud), but having worked for Amazon I’m fairly familiar with the AWS stack. This is less a judgment of which tool was best for the job, and more an indictment of my laziness to evaluate another tool. That said, Amazon’s offerings in this area are more than adequate. It also doesn’t hurt that Amazon’s free tier is fairly generous for a site as small as this one.
This site is stored in S3 and fronted by CloudFront to reduce data transfer costs. Amazon Certificate Manager (ACM) is used to generate an HTTPS certificate for the CloudFront endpoint. Lambda@Edge is employed to address a deficiency with how CloudFront handles (it doesn’t) index documents in subdirectories. I also create a dedicated IAM user with just enough privileges to manage the content in the S3 site bucket. All of this is automated as much as possible through the use of a CloudFormation template so I don’t have to manually configure things in the AWS console.
Cloudflare
I could have used AWS Route 53 DNS for this site, but I already use Cloudflare for all of my domains. Additionally, CloudFlare’s free tier also provides DDoS attack mitigation which can help prevent you from racking up a sizable bill if your site is attacked. It also doesn’t hurt that CloudFlare’s interface is nicer to use than Route 53.
GitHub
I already keep projects in public and private GitHub repositories. With GitHub’s unlimited private repositories and the new GitHub Actions feature, you have a simple, effective, and inexpensive CI/CD pipeline to automatically build and deploy your site changes.
At the time of writing this article, GitHub includes 2000 free GitHub Actions minutes per month for private repository Actions of free accounts. The GitHub Actions workflow this site uses takes approximately 30 seconds to run, permitting more than enough site updates for my needs. If you chose to keep your site repository public, you don’t need to worry about GitHub Actions minutes because they are completely free for public repositories. GitHub Actions self-hosted runners are another option for addressing GitHub Actions minutes restrictions on free accounts – they are also an option if you have more specialized needs for your GitHub Actions.
Create Your AWS Resources Using Cloudformation
Hopefully, I haven’t lost you at this point. It may seem like there are a lot of moving parts, but the CloudFormation template and GitHub Actions script do most of the heavy lifting.
The CloudFormation Template
The CloudFormation template takes care of creating all the AWS resources needed to host this site. The template uses template parameters so it may be reused for multiple sites (e.g. my son’s short story site) without having to change the content of the template. I have also added template outputs so you don’t have to hunt for information needed in later steps of this article.
CloudFormation Template Parameters:
- DomainName - This is the primary name that you want your site to be reached at. This value is used by CloudFront to
correctly route requests and by ACM for the primary hostname of the SSL certificate that is created. e.g.
example.org - AdditionalCnames (OPTIONAL) - You can add additional hostnames you would like your site to be reached at (if any).
These will be used to correctly route requests in CloudFront. They will also be used to create Subject Alternative Names
(SANs) in the SSL certificate created by ACM. e.g.
www.example.org, another.example.org. - IndexDocument - The default document you would like to use for the root and subdirectories of your site. Note that
due to an odd inconsistency in how CloudFront is configured, this should not be preceded by a ‘/’. e.g.
index.html - ErrorDocument - The error document you would like to return when a request to your website can not be completed.
Note that due to an odd inconsistency in how CloudFront is configured, this should be preceded by a ‘/’. e.g.
/404.html - LogBucketTtl - An S3 log bucket is created to log access of the S3 bucket containing the site content. This parameter
is the length of time in days you would like these logs to be kept around before they are automatically cleaned up. e.g.
7
CloudFormation Template Outputs:
- CloudFrontDomain - The hostname of the CloudFront distribution that is created.
- SiteBucketName - The name of the S3 bucket that is created to hold site content.
Download static-website-resources.yml
AWSTemplateFormatVersion: 2010-09-09
Parameters:
  DomainName:
    Description: The primary FQDN name for this site
    Type: String
  AdditionalCnames:
    Description: Additional CNAMES for this site separated by commas
    Type: CommaDelimitedList
  IndexDocument:
    Description: The default document to display when retrieving the root of the CloudFront distribution.
    Type: String
    Default: index.html
  ErrorDocument:
    Description: The document to display when a 4xx error occurs. Be sure that this is a full path from the root with a preceding '/'.
    Type: String
    Default: /404.html
  LogBucketTtl:
    Description: Log bucket TTL in days
    Type: Number
    MinValue: 1
    MaxValue: 31

Conditions:
  HasAdditionalCnames: !Not [ !Equals [ "", !Join [ "", !Ref AdditionalCnames ] ] ]

Outputs:
  CloudFrontDomain:
    Description: >-
      The CloudFront domain name you should point a CNAME to.
    Value: !GetAtt CloudFront.DomainName
  SiteBucketName:
    Description: >-
      The name of the S3 bucket for your site content.
    Value: !Ref SiteBucket

Resources:
  LogBucket:
    Type: AWS::S3::Bucket
    Properties:
      AccessControl: LogDeliveryWrite
      PublicAccessBlockConfiguration:
        BlockPublicAcls: true
        IgnorePublicAcls: true
        BlockPublicPolicy: true
        RestrictPublicBuckets: true
      LifecycleConfiguration:
        Rules:
        - Id: GlobalTtl
          Status: Enabled
          ExpirationInDays: !Ref LogBucketTtl

  SiteBucket:
    Type: AWS::S3::Bucket
    Properties:
      AccessControl: Private
      PublicAccessBlockConfiguration:
        BlockPublicAcls: true
        IgnorePublicAcls: true
        BlockPublicPolicy: true
        RestrictPublicBuckets: true
      LoggingConfiguration:
        DestinationBucketName: !Ref LogBucket

  SiteBucketUser:
    Type: AWS::IAM::User
    Properties:
      UserName: !Ref DomainName
      Policies:
      - PolicyName: !Ref DomainName
        PolicyDocument:
          Version: 2012-10-17
          Statement:
          - Effect: Allow
            Action:
            - s3:DeleteObject
            - s3:GetBucketLocation
            - s3:GetObject
            - s3:ListBucket
            - s3:PutObject
            - s3:PutObjectAcl
            Resource:
            - !Sub 'arn:aws:s3:::${SiteBucket}'
            - !Sub 'arn:aws:s3:::${SiteBucket}/*'

  CloudFrontOriginAccessIdentity:
    Type: AWS::CloudFront::CloudFrontOriginAccessIdentity
    Properties:
      CloudFrontOriginAccessIdentityConfig:
        Comment: !Ref SiteBucket

  SiteBucketReadPolicy:
    Type: AWS::S3::BucketPolicy
    Properties:
      Bucket: !Ref SiteBucket
      PolicyDocument:
        Statement:
        - Action: s3:GetObject
          Effect: Allow
          Resource: !Sub 'arn:aws:s3:::${SiteBucket}/*'
          Principal:
            CanonicalUser: !GetAtt CloudFrontOriginAccessIdentity.S3CanonicalUserId

  LambdaRole:
    Type: 'AWS::IAM::Role'
    Properties:
      AssumeRolePolicyDocument:
        Version: '2012-10-17'
        Statement:
        - Effect: Allow
          Principal:
            Service:
            - 'lambda.amazonaws.com'
            - 'edgelambda.amazonaws.com'
          Action: 'sts:AssumeRole'
      ManagedPolicyArns:
      - 'arn:aws:iam::aws:policy/service-role/AWSLambdaBasicExecutionRole'

  IndexLambda:
    Type: AWS::Lambda::Function
    Properties:
      Runtime: nodejs12.x
      Role: !GetAtt LambdaRole.Arn
      Handler: index.handler
      Description: Get an index document if path ends in /
      MemorySize: 128
      Timeout: 5
      Code:
        ZipFile: |
          'use strict';
          const path = require('path');

          exports.handler = (event, context, callback) => {
            const { request } = event.Records[0].cf;

            console.log('Original request URI: ', request.uri);

            const parsedPath = path.parse(request.uri);
            let newUri = request.uri;

            console.log('Parsed Path: ', parsedPath);

            if (parsedPath.ext === '') {
              newUri = path.join(parsedPath.dir, parsedPath.base, 'index.html');
            }

            console.log('New request URI: ', newUri);

            // Replace the received URI with the URI that includes the index page
            request.uri = newUri;

            // Return to CloudFront
            return callback(null, request);
          };

  IndexLambdaVersionV1:
    Type: 'AWS::Lambda::Version'
    Properties:
      FunctionName: !Ref IndexLambda

  CloudFrontCertificate:
    Type: AWS::CertificateManager::Certificate
    Properties:
      DomainName: !Ref DomainName
      ValidationMethod: DNS
      SubjectAlternativeNames:
        Fn::If:
        - HasAdditionalCnames
        - !Ref AdditionalCnames
        - !Ref AWS::NoValue

  CloudFront:
    Type: AWS::CloudFront::Distribution
    Properties:
      DistributionConfig:
        CustomErrorResponses:
        - ErrorCode: 403 # Not found in S3 bucket "speak"
          ResponseCode: 404
          ResponsePagePath: !Ref ErrorDocument
        DefaultRootObject: !Ref IndexDocument
        Enabled: true
        PriceClass: PriceClass_All
        Aliases:
          Fn::If:
          - HasAdditionalCnames
          - !Split [ ",", !Join [ ",", [ !Ref DomainName, !Join [ ",", !Ref AdditionalCnames ] ] ] ]
          - [ !Ref DomainName ]
        Origins:
        - Id: origin
          DomainName: !GetAtt SiteBucket.DomainName
          S3OriginConfig:
            OriginAccessIdentity: !Sub 'origin-access-identity/cloudfront/${CloudFrontOriginAccessIdentity}'
        DefaultCacheBehavior:
          TargetOriginId: origin
          DefaultTTL: 300
          MaxTTL: 3600
          ForwardedValues:
            QueryString: false
          ViewerProtocolPolicy: redirect-to-https
          LambdaFunctionAssociations:
          - EventType: origin-request
            LambdaFunctionARN: !Ref IndexLambdaVersionV1
        ViewerCertificate:
            AcmCertificateArn: !Ref CloudFrontCertificate
            SslSupportMethod: sni-only
Create the CloudFormation Stack
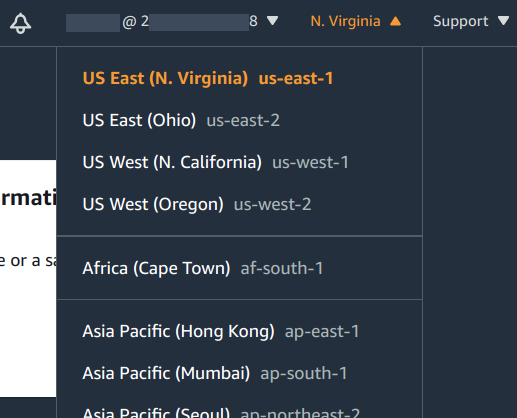
Before you start, it’s worth noting that the CloudFormation stack must be created in “US East (N. Virginia) us-east-1”. This is due to a limitation of Lambda@Edge. Hopefully, AWS will address this limitation in the future.
It’s also worth noting that the output of the Lambda invocation is cached by CloudFront for each resource that is requested. This is a good thing. The Lambda will be invoked infrequently, significantly reducing compute time costs if your site is busy enough to incur them.
Steps
Navigate to CloudFormation in the AWS Console.
Make sure you have N. Virginia (us-east-1) selected as the region in the upper right.
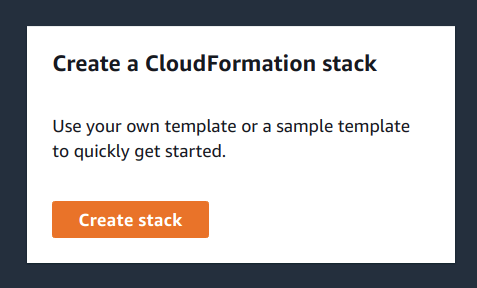
Select Create Stack.
Select Template is ready for Prepare template. Select Upload a template file for Template source. Finally, select Choose file and navigate to where you’ve saved static-website-resources.yml.
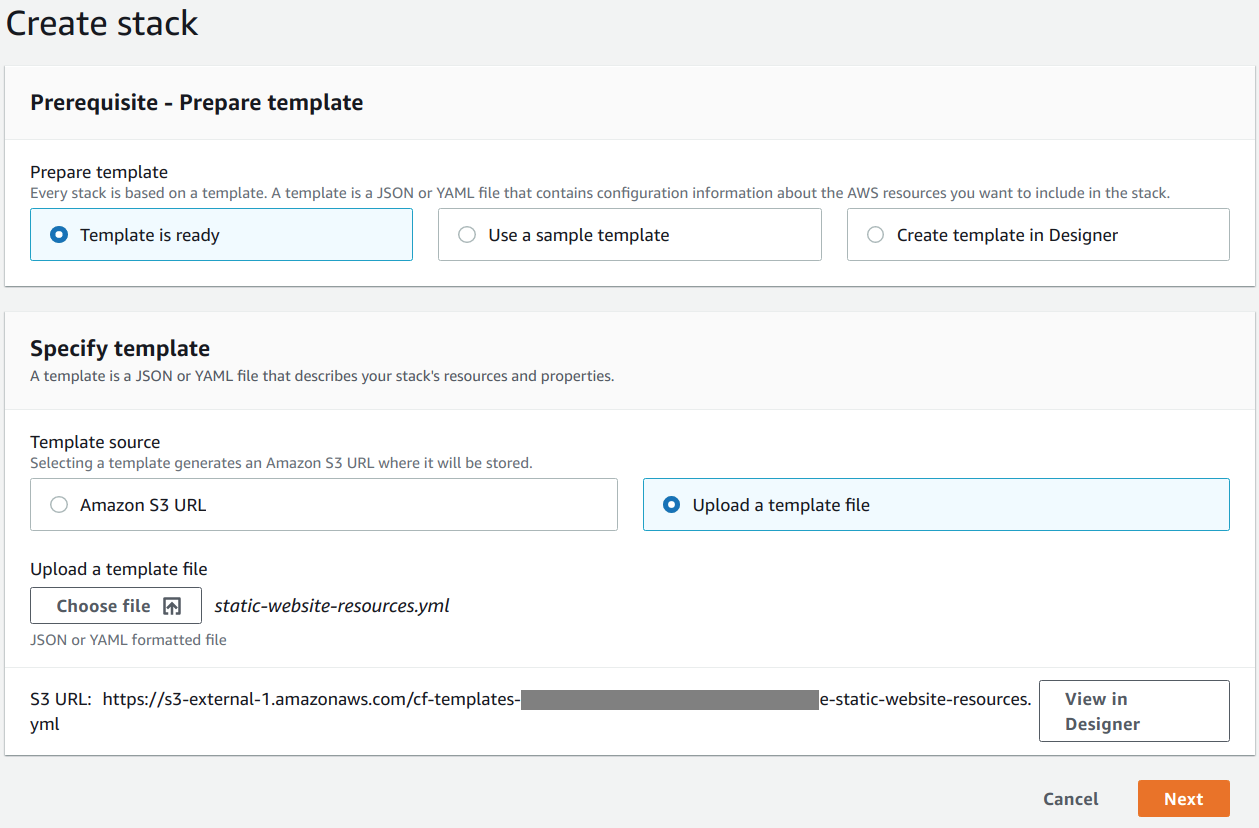
Select Next.
For the Specify stack details step, enter a suitable identifier in Stack name (e.g.
example-org-site). Also, choose suitable values for the requested parameters (e.g. AdditionalCnames ->www.example.org, another.example.org, DomainName ->example.org, ErrorDocument ->/404.html, IndexDocument ->index.html, LogBucketTtl ->7)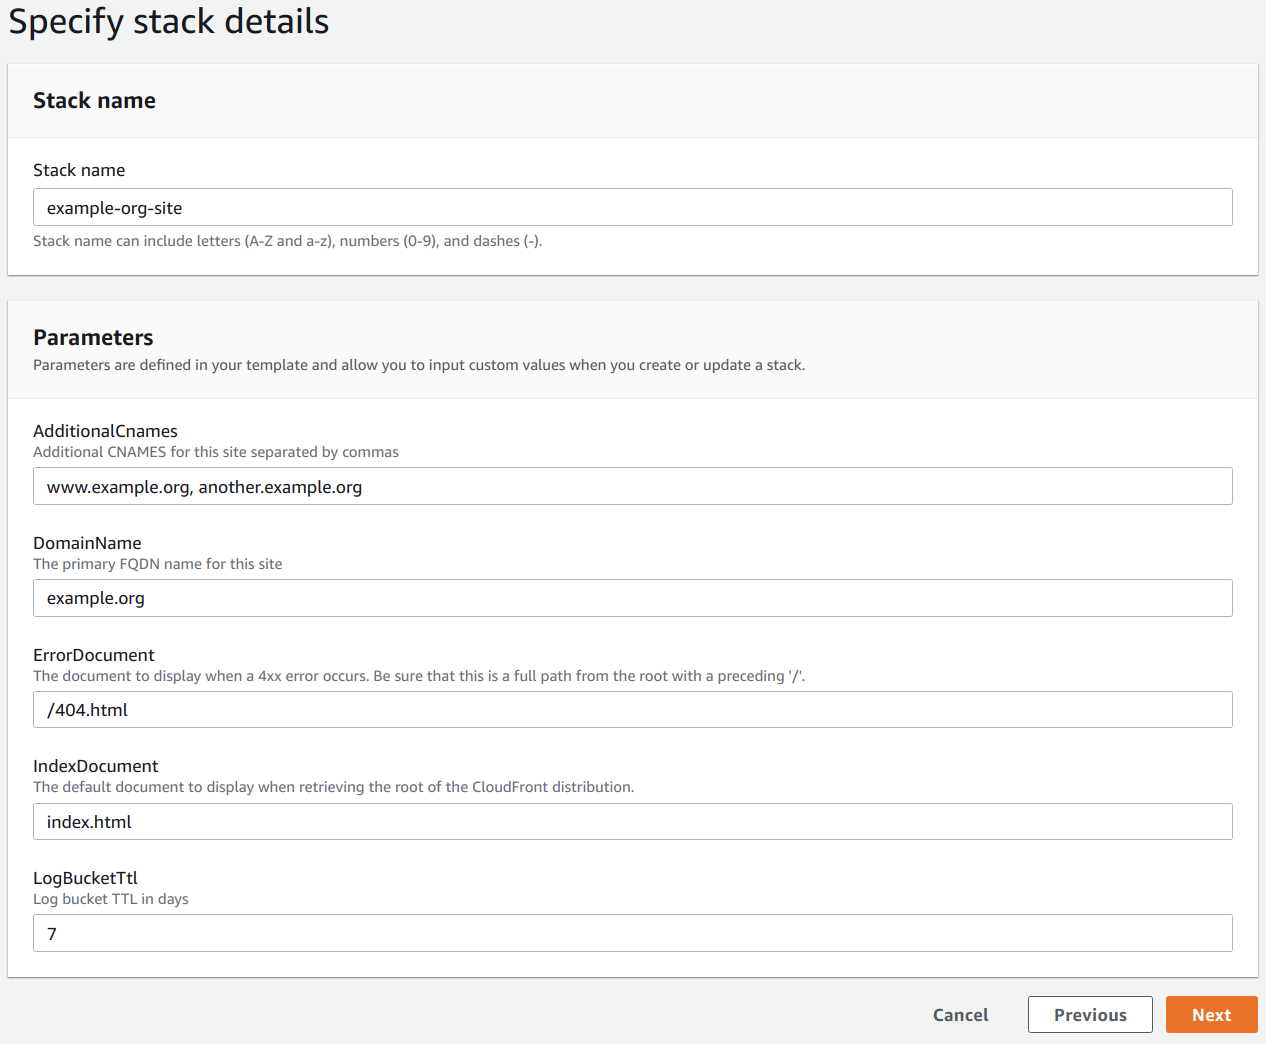
Select Next.
You don’t need to change any settings at the Configure stack options step, but I add a tag named
sitewith a value likeexample.org. Tags have many purposes, but in this particular case, I’m using one to keep track of what these resources were created for.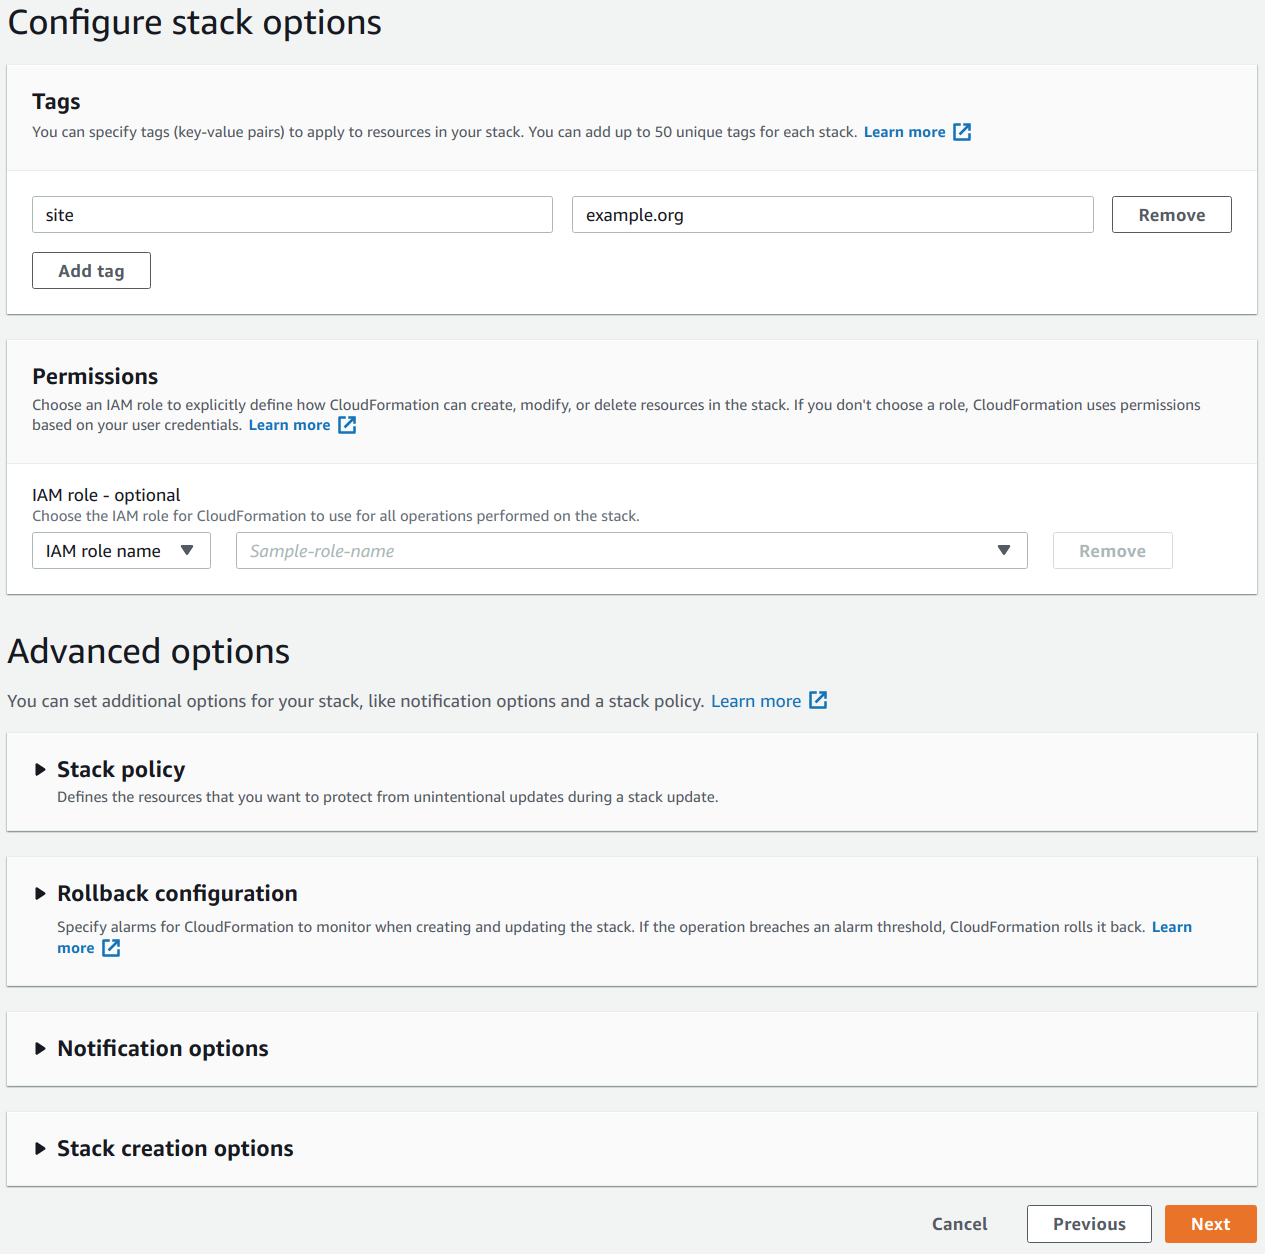
Select Next.
At this point you should be presented with the Review <your-stack-identifier> step. Review the information and select I acknowledge that AWS CloudFormation might create IAM resources with custom names.
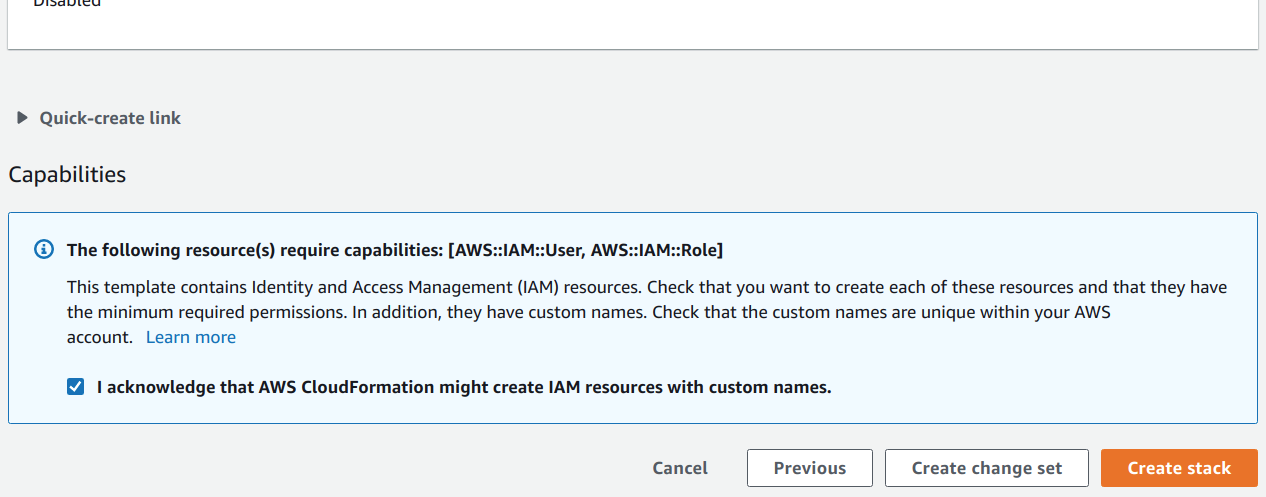
Select Create Stack.
ACM Certificate Validation
After you have selected Create Stack, you will need to wait for the stack creation to pause for validation of your newly
generated ACM SSL certificate. The stack will remain in CREATE_IN_PROGRESS status until the certificate validation has
completed. Once the stack creation is in this state, you are on a timer to complete the validation before the stack creation
fails. Don’t worry. I believe the operation times out in 12 hours – more than enough time for the next steps.
Within a couple of minutes, you should see a CloudFrontCertificate event in your CloudFormation stack event log for
your ACM SSL certificate. It should contain a status reason similar to the following: Content of DNS Record is: {Name: _0123456789abcdef0123456789abc.example.org.,Type: CNAME,Value: _fedcba9876543210fedcba9876543210.wggjkglgrm.acm-validations.aws.}.
If you didn’t provide any additional CNAMEs for the site and certificate, this message should contain everything you need.
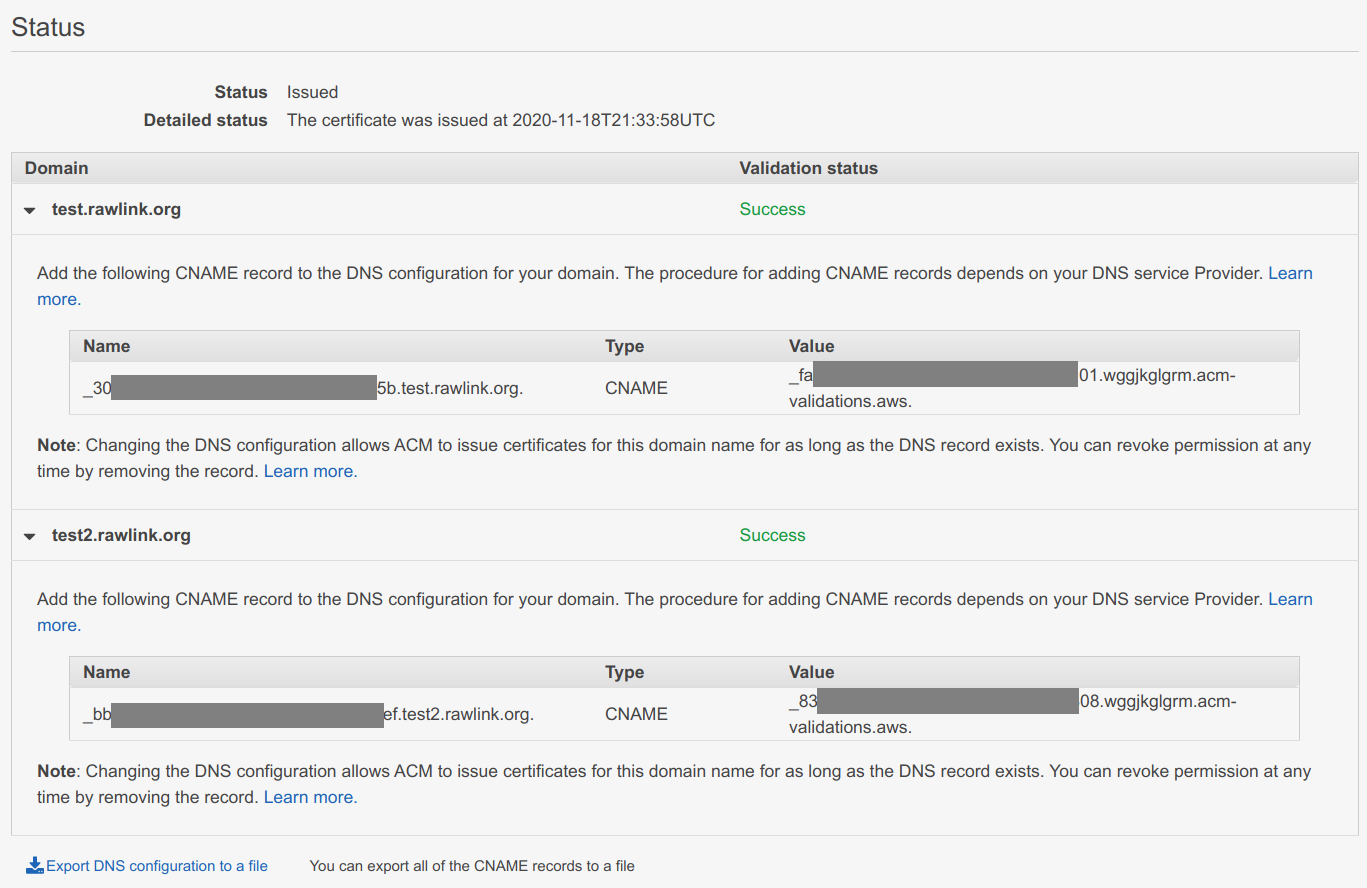
Otherwise, you will need to navigate to Certificate Manager in the AWS Console and expand the entry for the domain name
you specified – it should have a Status of Pending validation. In the Status section of the expanded entry you
should see a list of domains. Expand each of those to display the information for each of the CNAMEs you will need to create
to validate your certificate.
I chose DNS validation rather than email validation because once you have added the validation CNAME no future work or complex mechanisms are needed when the certificate is renewed – ACM will continue to use that same CNAME for future validations to prove that you own the specified domain.
I use Cloudflare for managing my DNS – you will need to adapt the following steps if you choose to use a different DNS provider.
Steps
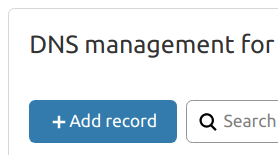
Select the domain you would like to manage in the Cloudflare console.
Select the DNS icon.
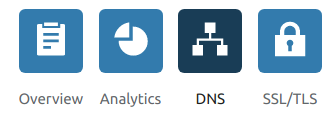
Select Add record.
Change the Type to
CNAME.Enter the Name from AWS Certificate Manager into the Name field, including the trailing dot (e.g.
_0123456789abcdef0123456789abc.example.org.).Enter the Value from AWS Certificate Manager into the Target field, including the trailing dot (e.g.
_0123456789abcdef0123456789abcdef.wggjkglgrm.acm-validations.aws.).Switch the Proxy Status from
ProxiedtoDNS onlyby clicking on the cloud icon under Proxy Status.Set the TTL field to
Autoif it isn’t already.
Select Save.
Rinse and repeat for each domain that needs validation.
Assuming you have entered the information correctly, you should see the domain’s Validation status in AWS Certificate
Manager change from Pending validation to Success. Be patient, this may take ~15 minutes because AWS Certificate Manager
only checks periodically.
If the DNS validation seems to be taking a long time (> 2 hours), there may be errors in the CNAME records you created. Carefully review that the data you entered in the CNAME record is correct and address any issues you find.
CloudFormation Stack Creation Outputs
Once certificate validation has completed, the CloudFormation stack creation should resume. When it has completed, you should
see its status change from CREATE_IN_PROGRESS to CREATE_COMPLETE. You will need to be patient with CloudFormation as
it can take a while (15-30 minutes) to create the resources in the template. Once completed, navigate to the Outputs
section of the CloudFormation stack and record the Value for the CloudFrontDomain and SiteBucketName keys. You will
need these values for later steps.
If the stack creation reaches an error state, don’t panic. Carefully review the stack creation events for errors and address them. You will probably need to delete the stack and recreate it to kick things off again once you have addressed any issues.
Create Security Credentials for the S3 Bucket User
The CloudFormation template creates an IAM user with the minimum permissions required to manage the static website content S3 bucket. You will need to create security credentials for this user that will be used by GitHub Actions to publish your website when you commit new site content.
Navigate to IAM in the AWS console.
Select Users.
Select the user that matches your site name (e.g. example.org). If the user is not immediately visible on the first page of users, use the search function to quickly find it.

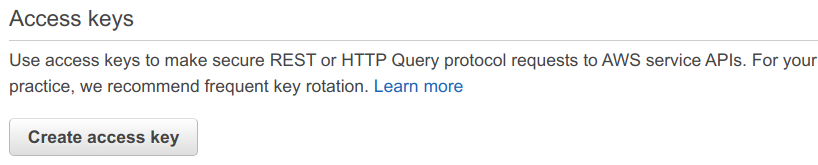
Select the Security credentials tab.

Select Create access key in the Access keys section.
You will be presented with a dialog containing the access key information. This information is comprised of two pieces of data, an Access key ID and a Secret access key. Copy this information or download the .csv file to use later. Once you close the dialog, you will no longer be able to access the Secret access key. Don’t worry though, access keys are easy to create – you can just delete it and recreate another. In fact, it’s good security practice to periodically rotate a user’s security credentials.
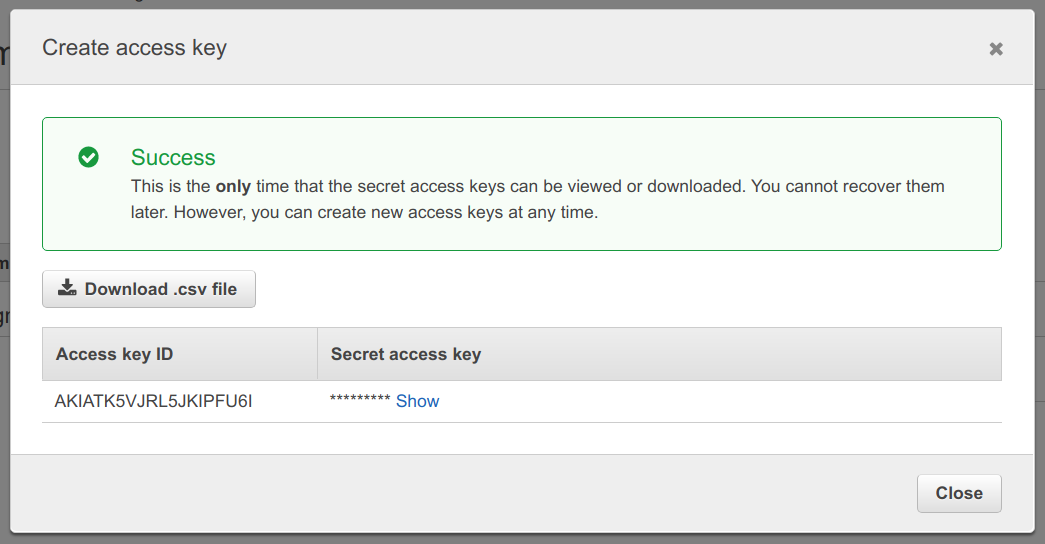
Close the dialog.
Phew!
Congratulations, the hard part is complete – give yourself a well deserved pat on the back. You should be proud of yourself. You just created the serverless infrastructure for hosting your site. If that seemed involved, imagine if you had to manually create those resources in the AWS console. Trust me. This was much simpler and much less error prone.
The good news is that you may never need to make changes to these AWS resources again, other than periodic security credential rotations for the site bucket user.
Hugo Setup
I will leave the details of how to install Hugo to the Hugo installation documentation. You should then follow the instructions in the Hugo Quick Start guide to create your site.
As stated earlier, there are plenty of Hugo Themes to choose from. Experiment! Don’t be afraid of making mistakes. If you don’t like the way a theme works or looks, delete the directory and start over. The simplicity and speed of Hugo makes it easy to experiment.
Once you have an idea of what you like and what works best for you, it’s time to automate building and deploying your site.
Continuous Deployment
Import Your Hugo Project Into GitHub
Next, import your Hugo Project into GitHub using these GitHub’s instructions.
Once you’ve completed that, go ahead and do any additional housekeeping like adding a README.md or .gitignore to your
project. Commit and push the changes.
Add Configuration Secrets to Your Repository
You should never commit sensitive information like passwords, PINs, private keys, and AWS credentials into a Git repository. Luckily, GitHub has an answer for that. GitHub repository secrets are purpose-built to protect your sensitive data. GitHub secrets are immediately encrypted, are not able to be viewed after creation, but can be updated whenever needed. These secrets are accessible to GitHub Actions, allowing your workflow to use sensitive information like AWS credentials without requiring you to commit them into your repository or enter them every time a workflow runs.
Do you remember the AWS user credentials and S3 bucket name we recorded earlier? It’s time to add them as secrets to your newly created GitHub repository to be used by the GitHub Action that will build and deploy your site.
Steps
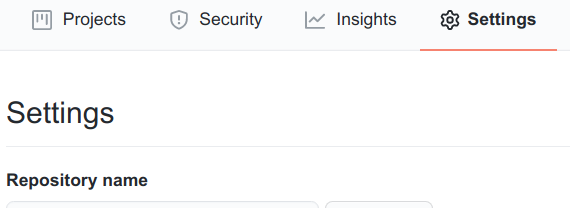
Navigate to your newly created repository in the GitHub console.
Select Settings.
Select Secrets.
Select New repository secret.
Enter
AWS_ACCESS_KEYinto Name. Enter the Access Key ID from the user security credential you created into Value.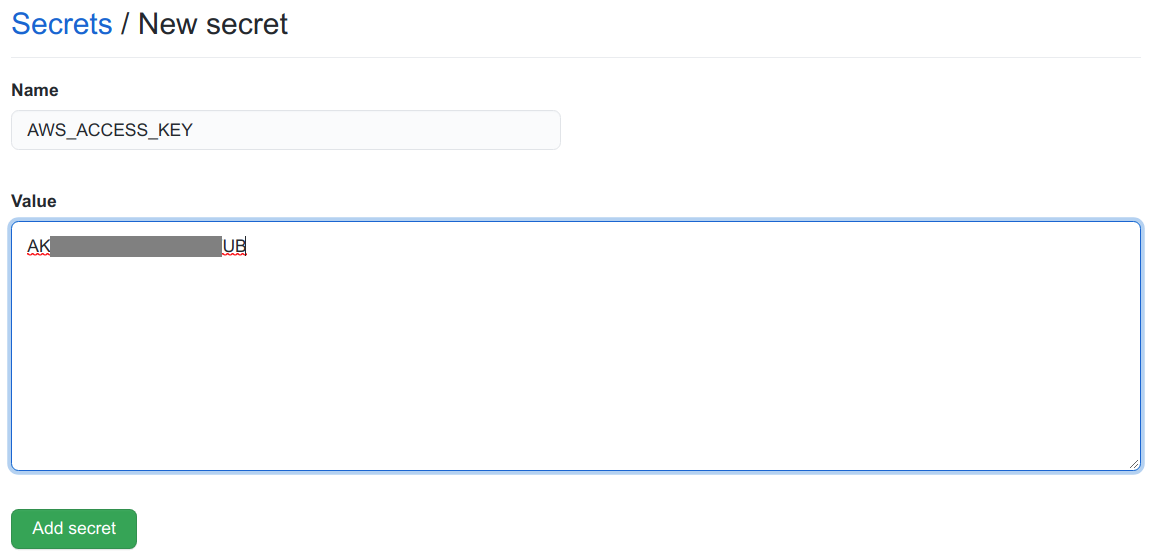
Select Add secret.
Select New repository secret.
Enter
AWS_SECRET_KEYinto Name. Enter the Secret Access Key from the user security credential you created into Value.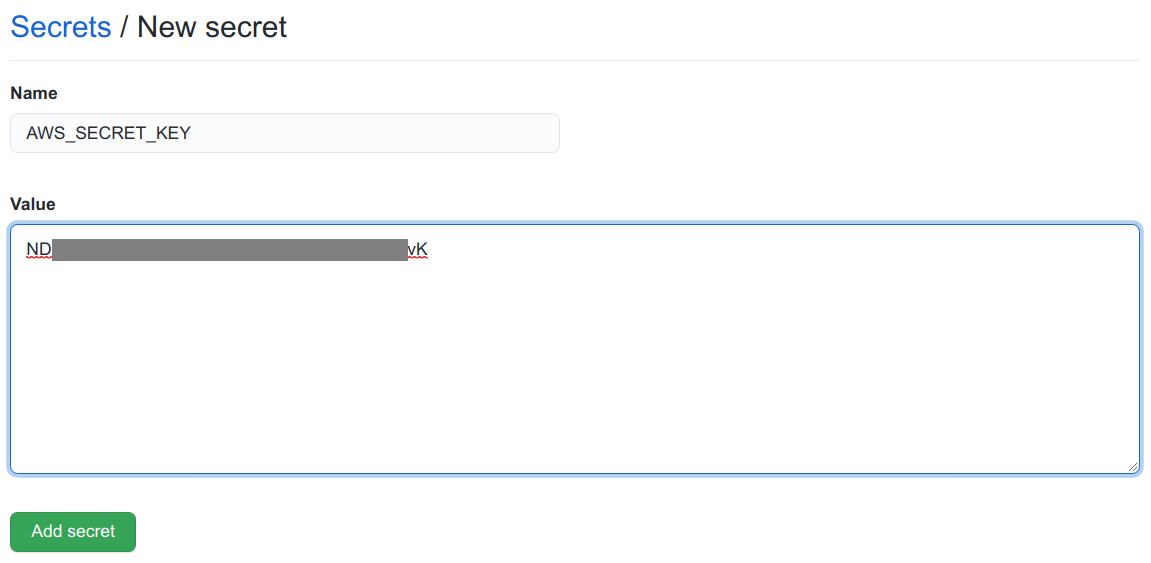
Select Add secret.
Select New repository secret.
Enter
AWS_S3_BUCKETinto Name. Enter the value of the SiteBucketName output from the CloudFormation stack into Value.
Select Add secret.
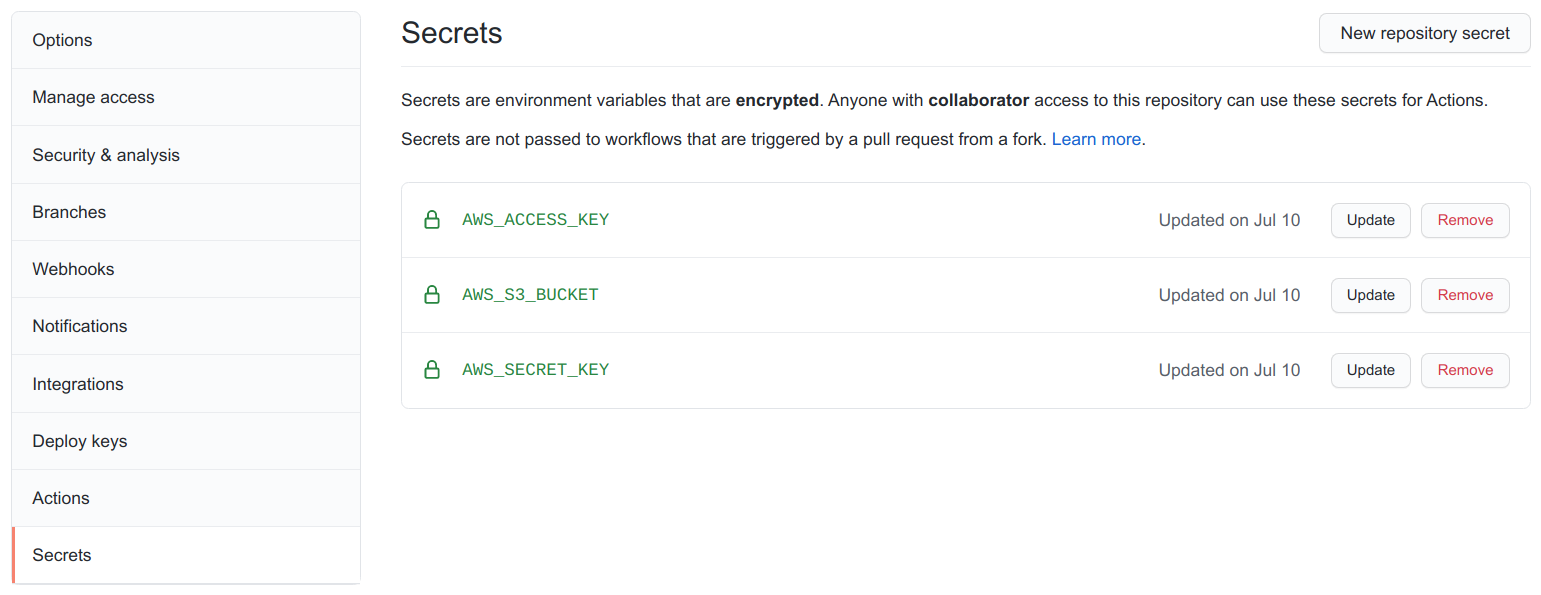
You should now have three secrets in your site repository – AWS_ACCESS_KEY, AWS_SECRET_KEY, AWS_S3_BUCKET.
Add the GitHub Actions Workflow
You might think it would be somewhat involved to configure an automated build and deploy for your Hugo site. It’s not –
it happens to be very straightforward with GitHub Actions. The following GitHub Actions workflow will run anytime you push
your code to the master branch of your site’s GitHub repository. All you have to do is add the workflow to your repository
and GitHub Actions will take care of the work.
My blog’s repository still uses a master branch for its default branch. In the future, GitHub and other vendors will be
using more racially sensitive labels, such as main, for a repository’s default branch. GitHub does have instructions
on how to rename your branch, but they are also going to create automated tools for addressing this soon. I’ll probably
take the plunge and try GitHub’s instructions on my Hugo test repository and run through the instructions for all my older
repositories that use a master branch, once I’m comfortable with the results. You will need to keep this in mind and edit
the following workflow to use branches: main instead of branches: master.
When you push to the specified branch, the workflow will check out the most recent sources, build the site using Hugo, and then deploy the static site to S3 using the credential and bucket secrets you created earlier.
name: Build and deploy Hugo site.
on:
  push:
    branches: master

jobs:
  build_and_deploy:
    runs-on: ubuntu-latest
    steps:
    - name: Checkout sources
      uses: actions/checkout@v2
      with:
        submodules: true
    - name: Build with hugo
      uses: klakegg/[email protected]
      with:
        image: ext-alpine
        command: --minify
    - name: Deploy to S3
      env:
        AWS_ACCESS_KEY_ID: ${{ secrets.AWS_ACCESS_KEY }}
        AWS_SECRET_ACCESS_KEY: ${{ secrets.AWS_SECRET_KEY }}
        AWS_DEFAULT_REGION: us-east-1
      run: |
        aws s3 sync public/ s3://${{ secrets.AWS_S3_BUCKET }} --delete
Steps
- Navigate to the base directory of your site repository.
- Create a subdirectory named
.github. - Create a subdirectory under the
.githubdirectory namedworkflows. - Save main.yml into the newly created
<repo_base>/.github/workflows/directory. Make sure to edit the workflow to trigger on pushes tomaininstead ofmasterif your repository is newer. - Commit the
main.ymlfile and push your changes to GitHub.
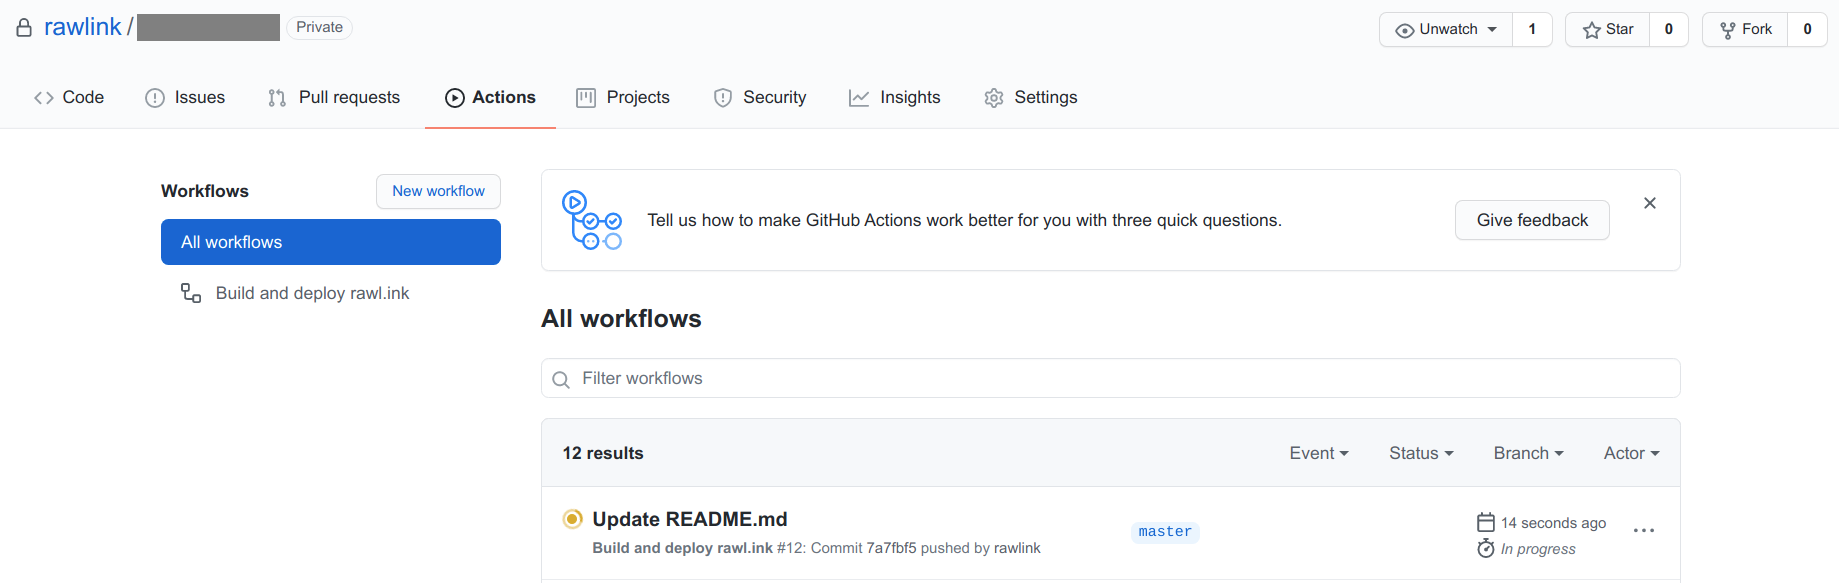
That’s it for setting up your Continuous Deployment pipeline! Navigate to Actions for your site repository in the GitHub console. You should see your workflow running. If all goes well, there won’t be any errors, and your content will be deployed to your S3 bucket.
Make Your Site Public
You are almost there. There is just one last thing to do. Point your domain name(s) at your new creation.
Steps
Select the domain you would like to manage in the Cloudflare console.
Select the DNS icon.
Select Add record.
Change the Type to
CNAME.If the DomainName property you entered into the CloudFormation stack is your base domain (e.g.
example.org), enter@into the Name field. Otherwise, you will enter everything but your base domain into the Name field (e.g.www.example.orgbecomeswww,www.blog.example.orgbecomeswww.blog).Enter the CloudFrontDomain CloudFormation output value you recorded earlier from AWS Certificate Manager into the Target field.
Make sure the Proxy Status is set to
Proxied. If not you can switch it by clicking on the cloud icon under Proxy Status.
Select Save.
If you specified values for the AdditionalCnames CloudFormation template property, repeat these instructions for each of those values. You will use those values in place of the DomainName property for each additional CNAME you create.
That’s it! Now that you have pointed your domain name(s) at the AWS CloudFront Distribution created by the CloudFormation template, your site will be accessible to anyone that knows its address. Don’t worry if your site isn’t immediately available. You may need to wait ~5 minutes (or 1-2 days if your domain was recently created) for DNS changes to become visible.
Project Resources
Files
- CloudFormation Template - static-website-resources.yml
- GitHub Actions Workflow - main.yml
Documentation
- Create an AWS Account
- Create a Cloudflare Account
- Create a GitHub account
- Markdown guide
- Hugo installation
- Hugo Quick Start guide
- Hugo Themes
- Jamstack.org - A list of Static Site Generators
- GitHub project import instructions